728x90

1. 이름으로 태그 불러오기

$('ul[name=commentChange]').hide()
  • <ul> 태그의 name이 commentChange인 태그를 숨긴다.

2. 태그 숨기기

$('pre[name=comment' + commentId + ']').contents().unwrap().wrap('<p></p>')
  • <pre>태그의 name이 comment + commentId(댓글 번호, 특정 댓글 태그만 변경하기 위한 값) 인 태그를 <p>태그로 바꿈
728x90

조회수 구현 게시글을 클릭해서 포스트를 조회할 때 조회수를 올려주기만 하면 된다.

그러나 이렇게만 한다면 댓글 작성할 때나 같은 아이디로 다시 들어갈 때나 조회수가 계속 올라간다.

이를 방지하기 위해 쿠키를 이용해서 조회수를 구현하는 방법을 기록한다.

쿠키란?

  • 서버가 클라이언트에게 보내는 데이터 중 하나로써, 클라이언트는 받은 쿠키 데이터를 로컬영역에 저장한다.
  • 다음에 서버를 방문한다면 쿠키를 요청 헤더에 포함해서 서버에게 전달한다.

1. 게시판 DB

CREATE TABLE `tb_board` (
  `id` int NOT NULL AUTO_INCREMENT,
  `title` varchar(255) NOT NULL,
  `content` text NOT NULL,
  `writer_id` int NOT NULL,
  `writer` varchar(20) NOT NULL,
  `delete_yn` varchar(1) DEFAULT 'N',
  `create_date` datetime DEFAULT NULL,
  `views` int DEFAULT '0',
  `image` varchar(255) DEFAULT NULL,
  PRIMARY KEY (`id`),
  KEY `writer_id` (`writer_id`),
  CONSTRAINT `tb_board_ibfk_1` FOREIGN KEY (`writer_id`) REFERENCES `tb_userinfo` (`id`) ON DELETE CASCADE
)
  • views : 조회수

2. View에 조회수 추가 (게시판 목록 html)

            <!-- contents -->
            <table class="table caption-top table-bordered table-hover">
                <caption>List</caption>
                <thead>
                    <tr>
                        <th class="text-center" width="50" scope="col">No</th>
                        <th class="text-center" width="950" scope="col">제목</th>
                        <th class="text-center" width="180" scope="col">작성자</th>
                        <th class="text-center" width="200" scope="col">작성일</th>
                        <th class="text-center" width="150" scope="col">조회수</th>
                    </tr>
                </thead>

                <tbody>
                    <tr th:each="board : ${boardList}">
                        <td class="mt-5 text-center" scope="row" th:text="${board.id}">1</td>
                        <td><a th:text="${board.title}" th:href="@{/board/post(id=${board.id})}" style="text-decoration:none; color:black;">제목</a></td>
                        <td class="text-center" th:text="${board.writer}">작성자</td>
                        <td class="text-center" th:text="${#dates.format(board.createDate, 'yyyy/MM/dd HH:mm')}">작성일</td>
                        <td class="text-center" th:text="${board.views}">조회수</td>
                    </tr>
                </tbody>
            </table>
  • 마지막 줄 th:text="${board.views}" : 조회수

3. Service

// 조회수 증가
    public void updateViews(Board board, String username, HttpServletRequest request,
                            HttpServletResponse response) throws Exception {
        Cookie[] cookies = request.getCookies();
        Map<String, String> mapCookie = new HashMap<>();

        if (request.getCookies() != null) {
            for (int i = 0; i < cookies.length; i++) {
                mapCookie.put(cookies[i].getName(), cookies[i].getValue());
            }

            String viewsCookie = mapCookie.get("views");
            String newCookie = "|" + board.getId();

            // 쿠키가 없을 경우 쿠키 생성 후 조회수 증가
            if (viewsCookie == null || !viewsCookie.contains(newCookie)) {
                Cookie cookie = new Cookie("views", viewsCookie + newCookie);
                response.addCookie(cookie);

                boardRepository.updateViews(board);
            }
        }
    }
  • request : 쿠키 정보를 얻을 HttpServletRequest 객체
  • response : 쿠키 정보를 추가할 HttpServletResponse 객체 
  • mapCookie.put : HashMap을 이용해 key value로 쿠키 값을 저장
  • viewsCookie : hashmap에 views라는 key값으로 저장된 value객체를 저장
  • newCookie : 새로운 쿠키를 추가할 때 사용 (id : 게시판 번호)
  • 쿠키 객체를 생성하고 추가할 쿠키 값을 초기화
    • 2번 게시글 조회 -> (views, null|2)
    • 3번 게시글 조회 -> (views, null|2|3) ...
  • response.addCookie를 통해 쿠키를 추가하고 조회수 1 증가
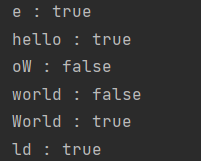
  • contains -> https://black-mint.tistory.com/39
 

[Java] String contains() 문자열 포함 여부

문자열 포함 여부 확인 방법을 기록한다. 1. 코드 String s = "hello World"; System.out.println("e : " + s.contains("e")); System.out.println("hello : " + s.contains("hello")); System.out.println("oW :..

black-mint.tistory.com

4. Controller

// 포스트 조회
@GetMapping("/post")
public String readPost(Model model, @RequestParam(required = false) Long id,
                       Principal principal, HttpServletRequest request,
                       HttpServletResponse response) throws Exception {
    String loginUser = principal.getName();
    Board board = boardService.contentLoad(id);

    boardService.updateViews(board, loginUser, request, response);

    model.addAttribute("board", board);
    model.addAttribute("loginUser", loginUser);

    return "board/post";
}
  • 쿠키를 사용하기 위해 HttpServletRequest request, HttpServletResponse response 를 파라미터로 받는다.
728x90

비밀번호 찾기를 시도한 사용자의 비밀번호를 초기화 시키고 초기화된 비밀번호를 사용자 이메일로 보낸다.

1. 인증 절차

  • 구글 계정 관리 -> 보안 -> 앱 비밀번호 -> [메일], [windows 컴퓨터] 2개 선택 후 생성
  • 여기서 나오는 비밀번호를 application.properties에 추가할 것이다.

2. 설정

  • gmail -> 톱니바퀴 클릭 후 모든 설정보기

톱니바퀴

  • 전달 및 모든 POP/IMAP 진입

  • POP 다운로드 -> 모든 메일에 POP 사용하기체크
  • IMAP 액세스 -> IMAP사용 체크
  • 변경사항 저장

3. 의존성 추가

// https://mvnrepository.com/artifact/org.springframework.boot/spring-boot-starter-mail
implementation group: 'org.springframework.boot', name: 'spring-boot-starter-mail'


4. SMTP 설정

# GoogleMail
spring.mail.host=smtp.gmail.com
spring.mail.port=587
spring.mail.username=사용자 구글 아이디
spring.mail.password=인증 비밀번호
spring.mail.properties.mail.smtp.starttls.enable=true
spring.mail.smtp.auth=true
  • username=test2@gmail.com
  • password=아까 인증에서 비밀번호

5. MailService

@Autowired
private JavaMailSender javaMailSender;

// 메일을 통해 임시 비밀번호 전송
public void sendMail(String username, String userEmail, String temporaryPassword) {
    List<String> toUserList = new ArrayList<>();
    toUserList.add(userEmail);
    int userSize = toUserList.size();

    SimpleMailMessage simpleMailMessage = new SimpleMailMessage();
    simpleMailMessage.setTo((String[]) toUserList.toArray(new String[userSize]));
    simpleMailMessage.setSubject("임시 비밀번호를 보내드립니다.");
    simpleMailMessage.setText(username + "님의 임시 비밀번호 : " + temporaryPassword);

    javaMailSender.send(simpleMailMessage);
}


* 참고 사이트

https://kitty-geno.tistory.com/43


Spring Boot | 메일 발송하기 (Google SMTP)

▶ 스프링 부트 메일 발송하기 (Google SMTP) 1. Google 홈페이지 > Google 계정 관리(우측상단) 2. 보안 > 앱 비밀번호 앱 비밀번호는 위에 2단계 인증을 해야 생성됩니다. 3. 메일, Windows 컴퓨터 4. 앱 비..

kitty-geno.tistory.com


728x90

1. 확인창

if (confirm("정말 삭제하시겠습니까?")) {
	// 확인 클릭시
} else { // 취소 클릭 시
	return;
}

2. 팝업창 띄우기

alert('hello')


728x90

name의 값을 가진 pre 태그를 p태그로 대체

$('pre[name=comment' + commentId + ']').contents().unwrap().wrap('<p></p>')

버튼에 onclick="함수" 걸어주고 함수 안에 작성해서 사용하면된다.


관련 프로젝트

https://black-mint.tistory.com/35


[Spring Boot] Ajax(비동기) 통신으로 댓글 구현 (+ Jquery 사용법)

게시판 댓글을 구현하는 도중 비동기 호출에 대해 알게 됐고, 이를 이용하려면 Ajax를 활용해야 한다는 정보를 얻었다. 비동기란? 비동기의 반대인 동기적 통신의 경우 절차적으로 일을 차례로

black-mint.tistory.com


728x90

1, 다른 태그 값 가져오기

var content = document.getElementById(id).innerText;

2. 사용자가 input 또는 textarea에 작성한 값 가져오기 (버튼 클릭시 실행)

var content = document.getElementById("newComment").value;


관련 프로젝트

https://black-mint.tistory.com/35


[Spring Boot] Ajax(비동기) 통신으로 댓글 구현 (+ Jquery 사용법)

게시판 댓글을 구현하는 도중 비동기 호출에 대해 알게 됐고, 이를 이용하려면 Ajax를 활용해야 한다는 정보를 얻었다. 비동기란? 비동기의 반대인 동기적 통신의 경우 절차적으로 일을 차례로

black-mint.tistory.com


728x90

자료형을 String으로 변환하는 방법을 기록한다.

1. 사용법

  • String.valueOf( )
Long a = 3l;
String s = String.valueOf(a);
System.out.println(s);

2. 변환 가능한 자료형

변환 가능한 자료형


 + 추가

  • 비슷한 사례로 int를 Long으로 변환하려 하면 Long.valueOf( int i ) 를 사용하면 된다.
  • [바뀌고자하는 자료형].valueOf( ) 로 기억하자 

'Language > Java' 카테고리의 다른 글

[Java] List Null 체크  (0) 2022.01.11
[Java] UUID란? (중복제거)  (0) 2022.01.09
[Java] String contains() 문자열 포함 여부  (0) 2022.01.03
[Java] Long, int <-> String 타입 변경  (0) 2022.01.03
[Java] String null, isEmpty() 확인  (0) 2022.01.03
728x90

문자열 포함 여부 확인 방법을 기록한다.

1. 코드

String s = "hello World";

System.out.println("e : " + s.contains("e"));
System.out.println("hello : " + s.contains("hello"));
System.out.println("oW : " + s.contains("oW"));
System.out.println("world : " + s.contains("world"));
System.out.println("World : " + s.contains("World"));
System.out.println("ld : " + s.contains("ld"));

2. 결과

결과

3. contains 결론

  • 붙어있는 문자열 사이 한 글자도 true반환
  • 공백을 구분한다.
  • 대/소문자를 구분한다.
728x90

1. Long에서 String으로 타입 변경과 String에서 Long으로 타입 변경을 기록한다.

  • Long to String
  • Long id = 3l; String s = Long.toString(id);
  • String to Long
  • String s = "3"; Long i = Long.parseLong(s);

2. int에서 String으로 타입 변경과 String에서 Long으로 타입 변경을 기록한다.

  • String to int
  • int to = Integer.parseInt(String s);
  • int to String
  • String s = Integer.toString(int i);
728x90

빈값확인 및 null확인


String a = "";
String b = null;

1. a의 경우

System.out.println(a.isEmpty());
  • 결과값 : true

2. b의 경우

System.out.println(b == null);
  • 결과값 : true

+ Recent posts