728x90

게시글 작성에서 파일 첨부하는 방법을 기록한다. (본 글은 이미지 첨부 방법을 다룸)


1. Mysql - file 테이블

CREATE TABLE `tb_file` (
  `id` int NOT NULL AUTO_INCREMENT,
  `board_id` int NOT NULL,
  `original_file_name` varchar(100) NOT NULL,
  `size` int NOT NULL,
  `path` varchar(100) NOT NULL,
  `stored_file_name` varchar(100) NOT NULL,
  PRIMARY KEY (`id`),
  KEY `board_id` (`board_id`),
  CONSTRAINT `tb_file_ibfk_1` FOREIGN KEY (`board_id`) REFERENCES `tb_board` (`id`) ON DELETE CASCADE
)
  • orginal_file_name : 사용자가 저장한 원본 파일이름
  • size : KB단위의 파일의 용량
  • path : 파일이 저장된 위치
  • stred_file_name : 서버에 저장된 uuid로 중복을 제거한 이름

2. FileDTO

@Data
public class FileDTO {
    private Long id;
    private Long boardId;
    private String originalFileName;
    private Long size;
    private String path;
    private String storedFileName;

    public FileDTO(Long boardId, String originalFileName, String storedFileName, Long size, String path) {
        this.boardId = boardId;
        this.originalFileName = originalFileName;
        this.storedFileName = storedFileName;
        this.size = size;
        this.path = path;
    }
}

3. 게시글 작성 Controller

    // 게시글 작성 & 수정
    @PostMapping("/form")
    public String boardSubmit(@Valid Board board, BindingResult bindingResult, Principal principal,
                              @RequestParam(value = "files", required = false) List<MultipartFile> files, Long id) throws IOException, SQLException {
        if (bindingResult.hasErrors() || files.size() > 7) {
            return "board/form";
        }

        String loginUsername = principal.getName();
        Long newBoardId = 0l;

        if (id == null) { // 새 글 작성
            newBoardId = boardService.save(board, loginUsername); // Insert

            // 첨부파일 있을 때
            if(!files.get(0).getOriginalFilename().isEmpty()) {
                for(int i = 0; i < files.size(); i ++) {
                    if(files.get(i).getContentType().contains("image/")) {
                        fileService.saveFile(files.get(i), newBoardId);
                    } else {
                        System.out.println("이미지 타입이 아닙니다");
                    }
                }
            }
        } else { // 기존 글 수정
            boardService.update(board, id); // Update
        }

        return "redirect:/board/list";
    }
  • @Valid : 게시글 작성 중에 제목과 내용의 제약조건(제목 2글자 이상 등)을 지키지 않으면 첫 줄의 if문을 통해 게시글 작성 홈페이지로 다시 돌아간다.
  • !files.get(0).getOriginalFilename().isEmpty() : MultipartFile 타입의 List의 첫 값을 통해 첨부파일의 존재 여부를 확인
  • getContentType을 통해 첨부파일의 형태가 IMAGE인지 확인 후 저장 로직 실행
  • @RequestParam(value = "files", required = false) : 값이 필수가 아닐 때 required = false 작성. (안적어주면 파일 첨부하지 않을 때 오류 Bad request 400 오류 발생)

4. Service

@Service
public class FileService {

    private final FileMapper fileRepository;

    @Autowired
    public FileService(FileMapper fileMapper) {
        this.fileRepository = fileMapper;
    }

    // 게시글 작성 & 수정에서 첨부파일 추가
    public void saveFile(MultipartFile file, Long boardId) throws IOException, SQLException {
        String uuid = UUID.randomUUID().toString(); // 파일명 중복 제거를 위한 uuid
        String originName = file.getOriginalFilename(); // 파일 원본명
        Long fileSize = file.getSize() / 1024; // kb

        String path = "C:/Temp/";
        String newName = "";

        if (originName.lastIndexOf(".") < 0) {
            newName = uuid + originName; // 확장자명이 없을 때
        } else {
            newName = uuid + StringUtils.substring(originName, originName.lastIndexOf(".")); //확장자명 포함
        }

        FileDTO fileDTO = new FileDTO(boardId, originName, newName, fileSize, path + newName);
        int result = fileRepository.insertFile(fileDTO);

        if (result > 0 && !file.getOriginalFilename().isEmpty()) {
            file.transferTo(new File(path + newName));
        }
    }
}
  • UUID를 이용해서 서버에 저장되는 파일명의 중복을 막는다.
  • StringUtils.substring을 이용해 확장자를 포함시켜 저장
  • result값을 받아서 insert가 바르게 진행 됐는지 확인 (바르게 저장 시 1 리턴)
  • MultipartFile.transferTo : if문 조건(result값과 MultipartFile의 null 체크)을 만족하면 서버로 첨부파일(이미지) 저장

5. View

    <main class="flex-shrink-0">
        <div class="container mt-3">
            <h2>게시판</h2>
            <form action="#" th:action="@{/board/form}" th:object="${board}" method="post"
                enctype="multipart/form-data">
                <input type="hidden" th:field="*{id}">
                <input type="hidden" th:field="*{writerId}">
                <div class="mb-3">
                    <label for="title" class="form-label">Title</label>
                    <input type="text" class="form-control"
                        th:classappend="${#fields.hasErrors('title')} ? 'is-invalid'" id="title" th:field="*{title}">
                    <div th:if="${#fields.hasErrors('title')}" th:errors="*{title}" id="validationServer03Feedback"
                        class="invalid-feedback">
                        Title Error
                    </div>
                </div>
                <div class="mb-3">
                    <label for="content" class="form-label">content</label>
                    <textarea class="form-control" id="content" rows="13"
                        th:classappend="${#fields.hasErrors('content')} ? 'is-invalid'"
                        th:field="*{content}"></textarea>
                    <div th:if="${#fields.hasErrors('content')}" th:errors="*{content}" id="validationServer03Feedback"
                        class="invalid-feedback">
                        Content Error
                    </div>
                </div>

                <div id="imageThumbnail">
                </div>

                <!-- button -->
                <div id="uploadForm" th:if="${param.boardId == null}">
                    <div id="uploadElement">
                        <input id="uploadInput" type="file" class="btn btn-outline-primary" name="files" accept="image/*"
                            onchange="setThumbnail(event);" multiple /> <span style="font-size: small;"> * jpeg / png 타입의
                            이미지를
                            7개까지
                            등록해주세요.</span>
                    </div>
                    <a id="reset" class="mt-3 btn btn-danger" onclick="resetImg()">Reset</a>
                </div>
                
                <div class="nav justify-content-end mb-5">
                    <button id="submit" type="submit" class="me-2 btn btn-primary">write</button>
                    <a type="button" class="btn btn-primary" th:href="@{/board/list}">exit</a>
                </div>
            </form>
        </div>
    </main>

    <script src="https://cdn.jsdelivr.net/npm/bootstrap@5.1.3/dist/js/bootstrap.bundle.min.js"
        integrity="sha384-ka7Sk0Gln4gmtz2MlQnikT1wXgYsOg+OMhuP+IlRH9sENBO0LRn5q+8nbTov4+1p"
        crossorigin="anonymous"></script>
  • th:if를 이용해서 새로운 글 작성 할 때만 이미지 첨부를 가능하게 제약조건 추가 (글 수정으로 글 작성 form으로 진입하는 경우 첨부파일 버튼을 html에서 제거)
  • <form> : enctype 속성을 "multipart/form-data" 로 설정해줘야 파일을 컨트롤러로 전달 가능
  • <div> : id="imageThumbnail"  <-- 여기에 첨부된 파일의 미리보기를 불러올 예정 (썸네일)
  • <input type="file" accept="image/*" multiple/> : accept로 첨부파일 선택 시 모든파일 -> image타입의 파일을 선택하도록 유도. multiple을 사용해야 다중 파일 선택 가능

6. script

    <script src="https://ajax.googleapis.com/ajax/libs/jquery/3.3.1/jquery.min.js"></script>
    <script>
        document.getElementById('submit').addEventListener('click', imageCounting)

        // 첨부 이미지 리셋 버튼
        function resetImg() {
            var fileUpload = document.getElementById('uploadInput')
            var img = document.querySelectorAll('img')
            fileUpload.value = null
            $('#imageThumbnail').children().remove()
        }

        // 이미지 개수 제한
        function imageCounting() {
            var fileUpload = $("input[type='file']")
            if (parseInt(fileUpload.get(0).files.length) > 7) {
                alert("이미지는 최대 7개까지 등록 가능합니다.")
            }
        }

        // 첨부 이미지 미리보기
        function setThumbnail(event) {
            for (var image of event.target.files) {
                var reader = new FileReader()

                reader.onload = function (event) {
                    var img = document.createElement("img")
                    img.className = "img-thumbnail mb-3 me-3"
                    img.name = "thumbnail"
                    img.style = "inline"
                    img.width = 200
                    img.height = 200
                    img.setAttribute("src", event.target.result)
                    document.querySelector("div#imageThumbnail").appendChild(img)
                }
                reader.readAsDataURL(image)
            }
        }
    </script>

 - resetImg (첨부 이미지 리셋, 첨부파일 리셋)

  • fileUpload.value = null 을 통해 지금까지 불러온 첨부파일 값을 null로 설정
  • $('#imageThumbnail').children().remove() : imageThumbnail 아이디의 태그 자식태그를 제거

 - imgCounting (첨부 개수제한)

  • $("input[type='file']") 를 이용해서 타입이 file인 input 태그를 가져와 저장

 - setThumbnail

  • FileReader를 이용해서 이미지 미리보기(썸네일) 정보 셋팅

7. 결과

테스트 전 file테이블 상태


시연


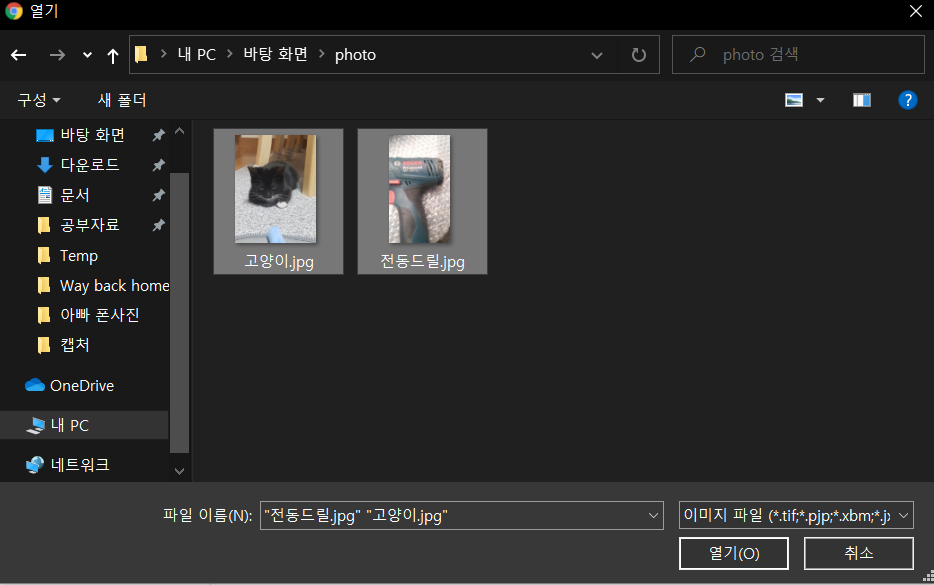
* 왜인지 모르겠으나 녹화할 때 파일 선택창이 안나와서 추가!

시연 후 MySQL 테이블
시연 후 추가된 파일들

8. 게시글 작성, 수정 (일부 코드 수정) : https://black-mint.tistory.com/70


[Spring Boot] 게시글 작성, 수정

이전 파일 업로드 글과 연관지어 게시글 작성의 구현을 마무리하고 이를 정리하겠습니다. 파일첨부에 대해서는 언급하지 않겠습니다! 이전 글 : https://black-mint.tistory.com/62?category=982467 [Spring Boot].

black-mint.tistory.com


6번 - setThumbnail 참고 : https://sinna94.tistory.com/entry/JavaScript-%EC%9D%B4%EB%AF%B8%EC%A7%80-%EC%97%85%EB%A1%9C%EB%93%9C-%EB%AF%B8%EB%A6%AC%EB%B3%B4%EA%B8%B0-%EB%A7%8C%EB%93%A4%EA%B8%B0

728x90

휴지통 삭제, 복원을 구현하는 방법으로 ajax 통신을 사용하기로 한다.

이 때 체크박스 체크된 게시글만 삭제, 복원 가능하도록 하려고한다.

 -> 리스트로 boardId를 서버로 보내서 처리하도록 한다!


1. Controller

    // 휴지통 게시글 복원
    @PatchMapping("/trash")
    @ResponseBody
    public void restoreBoards(@RequestParam(name = "boardIdList[]", required = false) List<String> boardIdList) {
        for(int i = 0; i < boardIdList.size(); i ++) {
            boardService.restore(Long.parseLong(boardIdList.get(i)));
        }
    }

    // 휴지통 게시글 영구 삭제
    @DeleteMapping("/trash")
    @ResponseBody
    public void clearBoards(@RequestParam(name = "boardIdList[]", required = false) List<String> boardIdList) {
        for(int i = 0; i < boardIdList.size(); i ++) {
            boardService.clear(Long.parseLong(boardIdList.get(i)));
        }
    }
  • @RequestParam(name = "boardIdList[]") : 배열을 List로 받을 것이기 때문에 변수 끝에 대괄호([])를 붙여준다.

2. View

            <!-- contents -->
            <form class="row g-3 justify-content-end">
                <table class="table caption-top table-bordered table-hover">
                    <caption>List</caption>
                    <thead>
                        <tr>
                            <th class="text-center" width="50" scope="col"></th>
                            <th class="text-center" width="50" scope="col">No</th>
                            <th class="text-center" width="950" scope="col">제목</th>
                            <th class="text-center" width="200" scope="col">작성일</th>
                            <th class="text-center" width="180" scope="col">작성자</th>
                        </tr>
                    </thead>

                    <tbody>
                        <tr th:each="board : ${boardList}">
                            <td class="mt-5 text-center" scope="row">
                                <div class="checkbox">
                                    <input type="checkbox" name="boardIdList" th:value="${board.id}">
                                </div>
                            </td>
                            <td class="mt-5 text-center" scope="row" th:text="${board.id}">1</td>
                            <td><a th:text="${board.title}" th:href="@{/board/post(boardId=${board.id})}"
                                    style="text-decoration:none; color:black;">제목</a></td>
                            <td class="text-center" th:text="${#dates.format(board.createDate, 'yyyy/MM/dd HH:mm')}">작성일
                            </td>
                            <td class="text-center" th:text="${board.writer}">작성자</td>
                        </tr>
                    </tbody>
                </table>
                <div class="nav justify-content-end">
                    <button type="submit" class="btn btn-primary me-2" onclick="restoreBoards()">복원하기</button>
                    <button type="submit" class="btn btn-danger" onclick="deleteBoards()">삭제하기</button>
                </div>
            </form>
  • form 태그안에 버튼을 생성하고 각 버튼의 onclick을 등록한다.

3. ajax(script코드)

    <script src="https://ajax.googleapis.com/ajax/libs/jquery/3.3.1/jquery.min.js"></script>
    <script th:inline="javascript">
        // 게시글 복원
        function restoreBoards() {
            var boardIdList = []

            $('input[name="boardIdList"]:checked').each(function (i) {
                boardIdList.push($(this).val());
            });

            if (!isEmptyArr(boardIdList)) {
                var param = { "boardIdList": boardIdList }

                $.ajax({
                    url: "/trash",
                    type: "PATCH",
                    data: param,
                    async: false,
                    success: function (response) {
                        alert('복원 됐습니다.')
                        location.reload()
                    },
                    error: function (response) {
                        alert('복원에 실패했습니다.')
                    }

                })
            } else {
                alert('복원할 게시글을 선택해주세요.')
            }
        }

        // 게시글 삭제
        function deleteBoards() {
            var boardIdList = []

            $('input[name="boardIdList"]:checked').each(function (i) {
                boardIdList.push($(this).val());
            });

            if (!isEmptyArr(boardIdList)) {
                var param = { "boardIdList": boardIdList }

                $.ajax({
                    url: "/trash",
                    type: "DELETE",
                    data: param,
                    async: false,
                    success: function (response) {
                        alert('영구 삭제 됐습니다.')
                        location.reload()
                    },
                    error: function (response) {
                        alert('영구 삭제 실패했습니다.')
                    }

                })
            } else {
                alert('삭제할 게시글을 선택해주세요.')
            }

        }

        // 빈배열 체크
        function isEmptyArr(arr) {
            if (Array.isArray(arr) && arr.length === 0) {
                return true;
            }

            return false;
        }
    </script>
  • var boardIdList = [] : 자바스크립트 배열 선언
  • $('input[name="boardIdList"]:checked').each(function (i) {  boardIdList.push($(this).val());  }); 
    • 체크박스에 체크된 개수만큼 each로 반복.
    • push를 통해 값을 배열에 초기화
  • isEmptyArr : 배열이 비었는지 체크

4. 결과

시연


+ 3번 스크립트 코드 수정!

만약 다중 게시글을 삭제하는데 팝업이 뜨지 않는다면? 당연하다.. 비동기적 통신으로 ajax를 실행해서 그렇다.

이를 해결하려면 동기적으로 ajax 통신을 사용해야하는데, async: false를 ajax 코드에 추가해주면된다.


* ajax 사용하기 : https://black-mint.tistory.com/35


[Spring Boot] Ajax(비동기) 통신으로 댓글 구현 (+ Jquery 사용법)

게시판 댓글을 구현하는 도중 비동기 호출에 대해 알게 됐고, 이를 이용하려면 Ajax를 활용해야 한다는 정보를 얻었다. 비동기란? 비동기의 반대인 동기적 통신의 경우 절차적으로 일을 차례로

black-mint.tistory.com


728x90

조회수 구현 게시글을 클릭해서 포스트를 조회할 때 조회수를 올려주기만 하면 된다.

그러나 이렇게만 한다면 댓글 작성할 때나 같은 아이디로 다시 들어갈 때나 조회수가 계속 올라간다.

이를 방지하기 위해 쿠키를 이용해서 조회수를 구현하는 방법을 기록한다.

쿠키란?

  • 서버가 클라이언트에게 보내는 데이터 중 하나로써, 클라이언트는 받은 쿠키 데이터를 로컬영역에 저장한다.
  • 다음에 서버를 방문한다면 쿠키를 요청 헤더에 포함해서 서버에게 전달한다.

1. 게시판 DB

CREATE TABLE `tb_board` (
  `id` int NOT NULL AUTO_INCREMENT,
  `title` varchar(255) NOT NULL,
  `content` text NOT NULL,
  `writer_id` int NOT NULL,
  `writer` varchar(20) NOT NULL,
  `delete_yn` varchar(1) DEFAULT 'N',
  `create_date` datetime DEFAULT NULL,
  `views` int DEFAULT '0',
  `image` varchar(255) DEFAULT NULL,
  PRIMARY KEY (`id`),
  KEY `writer_id` (`writer_id`),
  CONSTRAINT `tb_board_ibfk_1` FOREIGN KEY (`writer_id`) REFERENCES `tb_userinfo` (`id`) ON DELETE CASCADE
)
  • views : 조회수

2. View에 조회수 추가 (게시판 목록 html)

            <!-- contents -->
            <table class="table caption-top table-bordered table-hover">
                <caption>List</caption>
                <thead>
                    <tr>
                        <th class="text-center" width="50" scope="col">No</th>
                        <th class="text-center" width="950" scope="col">제목</th>
                        <th class="text-center" width="180" scope="col">작성자</th>
                        <th class="text-center" width="200" scope="col">작성일</th>
                        <th class="text-center" width="150" scope="col">조회수</th>
                    </tr>
                </thead>

                <tbody>
                    <tr th:each="board : ${boardList}">
                        <td class="mt-5 text-center" scope="row" th:text="${board.id}">1</td>
                        <td><a th:text="${board.title}" th:href="@{/board/post(id=${board.id})}" style="text-decoration:none; color:black;">제목</a></td>
                        <td class="text-center" th:text="${board.writer}">작성자</td>
                        <td class="text-center" th:text="${#dates.format(board.createDate, 'yyyy/MM/dd HH:mm')}">작성일</td>
                        <td class="text-center" th:text="${board.views}">조회수</td>
                    </tr>
                </tbody>
            </table>
  • 마지막 줄 th:text="${board.views}" : 조회수

3. Service

// 조회수 증가
    public void updateViews(Board board, String username, HttpServletRequest request,
                            HttpServletResponse response) throws Exception {
        Cookie[] cookies = request.getCookies();
        Map<String, String> mapCookie = new HashMap<>();

        if (request.getCookies() != null) {
            for (int i = 0; i < cookies.length; i++) {
                mapCookie.put(cookies[i].getName(), cookies[i].getValue());
            }

            String viewsCookie = mapCookie.get("views");
            String newCookie = "|" + board.getId();

            // 쿠키가 없을 경우 쿠키 생성 후 조회수 증가
            if (viewsCookie == null || !viewsCookie.contains(newCookie)) {
                Cookie cookie = new Cookie("views", viewsCookie + newCookie);
                response.addCookie(cookie);

                boardRepository.updateViews(board);
            }
        }
    }
  • request : 쿠키 정보를 얻을 HttpServletRequest 객체
  • response : 쿠키 정보를 추가할 HttpServletResponse 객체 
  • mapCookie.put : HashMap을 이용해 key value로 쿠키 값을 저장
  • viewsCookie : hashmap에 views라는 key값으로 저장된 value객체를 저장
  • newCookie : 새로운 쿠키를 추가할 때 사용 (id : 게시판 번호)
  • 쿠키 객체를 생성하고 추가할 쿠키 값을 초기화
    • 2번 게시글 조회 -> (views, null|2)
    • 3번 게시글 조회 -> (views, null|2|3) ...
  • response.addCookie를 통해 쿠키를 추가하고 조회수 1 증가
  • contains -> https://black-mint.tistory.com/39
 

[Java] String contains() 문자열 포함 여부

문자열 포함 여부 확인 방법을 기록한다. 1. 코드 String s = "hello World"; System.out.println("e : " + s.contains("e")); System.out.println("hello : " + s.contains("hello")); System.out.println("oW :..

black-mint.tistory.com

4. Controller

// 포스트 조회
@GetMapping("/post")
public String readPost(Model model, @RequestParam(required = false) Long id,
                       Principal principal, HttpServletRequest request,
                       HttpServletResponse response) throws Exception {
    String loginUser = principal.getName();
    Board board = boardService.contentLoad(id);

    boardService.updateViews(board, loginUser, request, response);

    model.addAttribute("board", board);
    model.addAttribute("loginUser", loginUser);

    return "board/post";
}
  • 쿠키를 사용하기 위해 HttpServletRequest request, HttpServletResponse response 를 파라미터로 받는다.
728x90

문제점 : 패스워드 리셋을 위해 본인인증 과정 중 빈칸 양식을 제출하면 500 error를 보이는 현상이 나타남.

해결 : 컨트롤러에 if 문으로 isEmpt를 이용한 예외 처리 진행


// PW 찾기 폼 진입
@GetMapping("passwordResetForm")
public String passwordResetForm() {
    return "/account/passwordResetForm";
}

// PW 리셋 & 비밀번호 이메일 전송
@PostMapping("passwordReset")
public String passwordReset(String username, String email) {
    if(username.isEmpty() || email.isEmpty()) {
        return "redirect:/passwordResetForm?error=true";
    } else if(memberService.compareEmailUsername(username, email)) {
        String temporaryPassword = memberService.getRandomPassword(username);
        mailService.sendMail(username, email, temporaryPassword);

        return "redirect:/passwordResetForm?email=" + email;
    } else {
        return "redirect:/passwordResetForm?error=true";
    }
}
728x90

문제점 : 아이디 찾기를 구현하는 도중 View의 form을 제축하면 시큐리티에 의해 login폼으로 이동하였다.

해결 : 컨트롤러에서 사용한 redirect의 경로를 잘못 지정하였던 것을 고쳤다.

프로젝트 구조

  • resources > templates > account > findIdForm이 존재
    // ID 찾기
    @GetMapping("findIdForm")
    public String findIdForm(@RequestParam(required = false) String email, Model model) {
        if(email != null) {
            List<Member> memberList = memberService.getMemberByEmail(email);
            model.addAttribute("memberList", memberList);
        }
        return "/account/findIdForm";
    }

    // ID 찾기
    @PostMapping("/findId")
    public String findId(String email, Model model){ // view의 form->input 의 name과 매핑됨.
        if(memberService.checkEmail(email)) {
            return "redirect:/findIdForm?email=" + email;
        } else {
            return "redirect:/account/findIdForm?error=true";
        }
    }

<고치기 전 코드 (PostMapping의 else 부분)>

    // ID 찾기
    @GetMapping("findIdForm")
    public String findIdForm(@RequestParam(required = false) String email, Model model) {
        if(email != null) {
            List<Member> memberList = memberService.getMemberByEmail(email);
            model.addAttribute("memberList", memberList);
        }
        return "/account/findIdForm";
    }

    // ID 찾기
    @PostMapping("/findId")
    public String findId(String email, Model model){ // view의 form->input 의 name과 매핑됨.
        if(memberService.checkEmail(email)) {
            return "redirect:/findIdForm?email=" + email;
        } else {
            return "redirect:/findIdForm?error=true";
        }
    }

<고친 후 코드 (PostMapping의 else 부분)>

  • 컨트롤러에서 PostMapping을 이용해 아이디 찾기 폼의 양식을 제출.
  • email을 제대로 입력하지 않은 경우 redirect:/findIdForm?error=true를 반환
  • email을 제대로 입력한 경우 redirect:/findIdForm?email= url로 입력한 email을 보내서 View의 타임리프 구문에서 활용

결론 : redirect할 때 경로를 컨트롤러 기준으로 작성하여 고쳤다. 즉, 매핑되는 주소를 적어준다.

728x90

1. 페이징 처리를 위한 필드들 정의 (Pagination.class)

2. 총 컨텐츠 개수, 현재 페이지, 현재 페이지 블록(범위) 를 받아서 처리

3. 화면에 보여주기(View)


1. 프로젝트 구조

2. Pagination, Common 코드

@Data
public class Pagination extends Common{

    private int listSize = 10;  // 초기값으로 목록개수를 10으로 셋팅
    private int rangeSize = 10; // 초기값으로 페이지범위를 10으로 셋팅
    private int page;           // 현재 페이지
    private int range;          // 현재 페이지 범위 (1~10 = 1)
    private int listCnt;        // 총 게시물 개수
    private int pageCnt;        // 총 페이지 개수
    private int startPage;      // 각 페이지 범위 중 시작 번호
    private int startList;      // mysql용 게시판 시작 번호 (0, 10, 20..)
    private int endPage;        // 각 페이지 범위 중 마지막 번호
    private boolean prev;       // 이전 페이지 여부
    private boolean next;       // 다음 페이지 여부

    public void pageInfo(int page, int range, int listCnt) {

        this.page = page; // 현재 페이지
        this.listCnt = listCnt; // 게시물 개수 총합

        // 페이지 범위
        this.range = range;

        // 전체 페이지수
        this.pageCnt = (int) Math.ceil((double) listCnt / listSize);

        // 시작 페이지
        this.startPage = (range - 1) * rangeSize + 1 ;

        // 끝 페이지
        this.endPage = range * rangeSize;

        // 게시판 시작번호
        this.startList = (page - 1) * listSize;

        // 이전 버튼 상태
        this.prev = range == 1 ? false : true;

        // 다음 버튼 상태
        this.next = endPage > pageCnt ? false : true;

        if(this.endPage > this.pageCnt) {
            this.endPage = this.pageCnt;
            this.next = false;
        }
    }
}
  • Pagination : 페이지 처리에 필요한 필드 Common을 상속받고 활용할 외부 정보를 저장
package com.min.board.paging;

import lombok.Data;

@Data
public class Common {
    private String searchText;
    private String writer;
    private String type;
}
  • Common : 메인 게시판, 내 글 관리, 휴지통 등 컨텐츠를 보여줄 때 아래 페이지 처리를 해야하는데 이 때 사용 
  • searchText : 검색 기능이 필요한 페이지의 경우 사용
  • writer : 내 글 관리, 휴지통 등에서 사용자 정보를 저장
  • type : 메인 게시판, 내 글 관리, 휴지통 등 DB에서 가져오는 값이 다르므로 Mapper에서 <if> 문으로 동적 쿼리 진행

3. Mapper 코드

@Mapper
public interface BoardMapper {

    // 게시글 개수 반환 (메인 게시글, 글 관리, 휴지통)
    int selectBoardTotalCount(Pagination pagination);

    // 게시글 리스트 (메인 게시글, 글 관리, 휴지통)
    List<Board> selectBoardList(Pagination pagination);
}
<?xml version="1.0" encoding="UTF-8"?>

<!DOCTYPE mapper PUBLIC "-//mybatis.org//DTD Mapper 3.0//EN"
        "http://mybatis.org/dtd/mybatis-3-mapper.dtd">

<mapper namespace="com.min.board.repository.BoardMapper">

    <sql id="boardColumns">
        id
        ,title
        ,content
        ,writer_id
        ,writer
        ,delete_yn
        ,create_date
        ,image
    </sql>

    <!--(페이징) 게시글 모두 조회-->
    <select id="selectBoardList" resultType="Board">
        SELECT
            <include refid="boardColumns"/>
        FROM
            tb_board
        WHERE
            <if test="'list'.equals(type)">
                <include refid="CommonMapper.search"/>
            </if>
            <if test="'myPost'.equals(type)">
                <include refid="CommonMapper.myPost"></include>
            </if>
            <if test="'trash'.equals(type)">
                <include refid="CommonMapper.trash"></include>
            </if>
        ORDER BY
            id DESC,
            create_date
        <include refid="CommonMapper.paging"/>
    </select>

    <!--(페이징을 위한 카운트) 게시글 개수 카운트-->
    <select id="selectBoardTotalCount" resultType="int">
        SELECT
            COUNT(*)
        FROM
            tb_board
        WHERE
            <if test="'list'.equals(type)">
                <include refid="CommonMapper.search"/>
            </if>
            <if test="'myPost'.equals(type)">
                <include refid="CommonMapper.myPost"></include>
            </if>
            <if test="'trash'.equals(type)">
                <include refid="CommonMapper.trash"></include>
            </if>
    </select>
</mapper>

<BoardMapper.xml>

<?xml version="1.0" encoding="UTF-8"?>

<!DOCTYPE mapper PUBLIC "-//mybatis.org//DTD Mapper 3.0//EN"
        "http://mybatis.org/dtd/mybatis-3-mapper.dtd">

<mapper namespace="CommonMapper">
    <sql id="paging">
        LIMIT
            #{startList}, #{listSize}
    </sql>

    <sql id="search">
        delete_yn = 'N'
        <if test="searchText != null and searchText !=''">
            AND
            (
            title LIKE CONCAT('%', #{searchText}, '%')
            OR content LIKE CONCAT('%', #{searchText}, '%')
            )
        </if>
    </sql>

    <sql id="myPost">
        delete_yn = 'N'
        <if test="writer != null and writer !=''">
            AND writer = #{writer}
        </if>
    </sql>

    <sql id="trash">
        delete_yn = 'Y'
        <if test="writer != null and writer !=''">
            AND writer = #{writer}
        </if>
    </sql>
</mapper>

<CommonMapper.xml>

  • 코드관리를 위해 CommonMapper로 동적 쿼리 진행할 코드를 분리


4.  Service 코드

// 전체 게시글 개수 리턴
public int getBoardListCnt(Pagination pagination) {
    int boardTotalCount = 0;

    try {
        boardTotalCount = boardRepository.selectBoardTotalCount(pagination);
    } catch (Exception e) {
        System.out.println("boardRepository.getBoardListCnt() .. error : " + e.getMessage());
    } finally {
        return boardTotalCount;
    }
}

// 전체 게시글 리스트로 리턴
public List<Board> getBoardList(Pagination pagination) {
    List<Board> boards = Collections.emptyList();

    try {
        boards = boardRepository.selectBoardList(pagination);
    } catch (Exception e) {
        System.out.println("boardRepository.getMyBoardList() .. error : " + e.getMessage());
    } finally {
        return boards;
    }
}


5. Controller 코드

// 게시판 리스트 (게시글 페이징 및 검색 리스트)
@GetMapping("/list")
public String list(Model model,
                   @RequestParam(required = false, defaultValue = "1") int page,
                   @RequestParam(required = false, defaultValue = "1") int range,
                   String searchText) {
    int listCount = 0;

    Pagination pagination = new Pagination();
    pagination.setSearchText(searchText);
    pagination.setType("list");
    listCount = boardService.getBoardListCnt(pagination);
    pagination.pageInfo(page, range, listCount);

    List<Board> boards = boardService.getBoardList(pagination);

    model.addAttribute("pagination", pagination);
    model.addAttribute("boardList", boards);

    return "board/list";
}
  • 메인 게시판에 페이징 처리를 위해 page, range, searchText를 받아온다.
  • pagination에 검색어, type(게시판 = list, 내가쓴글 = myPost, 휴지통 = trash 등을 선언해 type에 맞는 동적 쿼리문 실행 유도)을 저장
  • listCount에 pagination 객체를 이용해서 총 게시글 개수를 저장
  • 최종적으로 Pagination 객체에 page, range, listCount를 초기화
  • List 형태의 boards 를 생성해서 현재 페이지에 맞는 컨텐츠를 받아옴.
// 글 관리에서 삭제
@PostMapping("/myPost/delete")
public String boardDelete(@RequestParam(required = false) List<String> boardIdList) {
    if(boardIdList == null) return "redirect:/board/myPost";
    if(boardIdList.size() > 0) {
        for(int i = 0; i < boardIdList.size(); i ++) {
            boardService.temporaryDelete(Long.parseLong(boardIdList.get(i)));
        }
    }

    return "redirect:/board/myPost";
}


6. View

            <p> 총 건수 : <span th:text="${pagination.listCnt}"></span></p>
            <form class="row g-3 justify-content-end" method="GET" th:action="@{/board/list}" name="searchForm">
                <div class="col-auto">
                    <input type="hidden" name="page" th:value="${param.page}">
                    <input type="hidden" name="range" th:value="${param.range}">
                    <label for="searchText" class="visually-hidden"></label>
                    <input type="text" class="form-control" id="searchText" name="searchText" th:value=${param.searchText}>
                </div>
                <div class="col-auto">
                    <button type="submit" class="btn btn-outline-secondary mb-3">Search</button>
                </div>
            </form>
            .
            .
            .
                <tbody>
                    <tr th:each="board : ${boardList}">
                        <td class="mt-5 text-center" scope="row" th:text="${board.id}">1</td>
                        <td><a th:text="${board.title}" th:href="@{/board/post(id=${board.id})}" style="text-decoration:none; color:black;">제목</a></td>
                        <td class="text-center" th:text="${#dates.format(board.createDate, 'yyyy/MM/dd HH:mm')}">작성일</td>
                        <td class="text-center" th:text="${board.writer}">작성자</td>
                    </tr>
                </tbody>
            </table>

            <!-- Page -->
            <nav th:replace="fragments/pagingCommon :: pagination(${pagination}, 'list')"></nav>

<list.html>

  • pagination.listCnt : 보여줄 게시글의 총 개수
  • input - hidden : name으로 컨트롤러로 page, range를 전송 (GET 방식이므로 url에 표시)
    • value=${param.range}" : url에 표시되는 range=3 값을 가져와 해당 input태그 값으로 셋팅
  • input - searchText : 컨트롤러로 searchText를 전송해서 결과값을 얻도록 유도 (th:value를 이용해서 검색후에도 해당 칸에 검색어가 그대로 남아있음)
  • <tbody> : 테이블에 게시판 글을 보여주기위한 컨텐츠
    • th:each="board : ${boardList}"> : 컨트롤러에서 받아온 List형태인 boardList를 변수명 board로 정의해서 리스트 값을 꺼내서 사용
    • ${dates.format(board.createDate, 'yyyy/MM/dd HH:mm')} : 날짜 형식을 2021/12/28 19:48 로 변경
 

[Spring Boot] Timestamp로 회원가입 시간 저장 (MySQL)

1. MySQL 시간을 담을 컬럼은 DATETIME으로 설정 2. DTO에 Timestamp 타입으로 선언 private Timestamp createDate; 3. 생성 시점에 시간 셋팅해주기 member.setCreateDate(Timestamp.valueOf(LocalDateTime.now()..

black-mint.tistory.com

  • th:replace="fragments/pagingCommon :: pagination(${pagination}, 'list')" : 프래그먼트를 이용해 분리된 페이징 화면을 불러와 사용
 

[Spring Boot] Thymeleaf 정리

스프링부트에서 타임리프로 프로젝트를 진행 중 2번 이상 다시 찾아본 개념에 대해 정리해놓으려 합니다. 기본 타임리프 문서 : https://www.thymeleaf.org/doc/tutorials/2.1/usingthymeleaf.html#standard-htmlx..

black-mint.tistory.com

list 화면


            <!-- contents -->
            <form class="row g-3 justify-content-end" method="post" th:action="@{/board/myPost/delete}">
                <table class="table caption-top table-bordered table-hover">
                    <caption>List</caption>
                    <thead>
                        <tr>
                            <th class="text-center" width="50" scope="col"></th>
                            <th class="text-center" width="50" scope="col">No</th>
                            <th class="text-center" width="950" scope="col">제목</th>
                            <th class="text-center" width="200" scope="col">작성일</th>
                            <th class="text-center" width="180" scope="col">작성자</th>
                        </tr>
                    </thead>

                    <tbody>
                        <tr th:each="board : ${boardList}">
                            <td class="mt-5 text-center" scope="row">
                                <div class="checkbox">
                                    <input type="checkbox" name="boardIdList" th:value="${board.id}">
                                </div>
                            </td>
                            <td class="mt-5 text-center" scope="row" th:text="${board.id}">1</td>
                            <td><a th:text="${board.title}" th:href="@{/board/post(id=${board.id})}"
                                    style="text-decoration:none; color:black;">제목</a></td>
                            <td class="text-center" th:text="${#dates.format(board.createDate, 'yyyy/MM/dd HH:mm')}">작성일
                            </td>
                            <td class="text-center" th:text="${board.writer}">작성자</td>
                        </tr>
                    </tbody>
                </table>
                <div class="nav justify-content-end">
                    <button type="submit" class="btn btn-danger">Delete</button>
                </div>
            </form>

            <!-- Page -->
            <nav th:replace="fragments/pagingCommon :: pagination(${pagination}, 'myPost')"></nav>

<myPost.html>

myPost 화면

  • input - checbox : 내 글 관리에서 체크박스로 삭제할 컨텐츠를 체크하기 위한 체크박스
    • th:value를 이용해서 해당 체크박스의 값을 컨텐츠 id로 지정
    • name을 컨트롤러의 파라미터와 똑같은 이름으로 설정
<body>
	<nav aria-label="Page navigation example" th:fragment="pagination(pagination, menu)">
		<ul class="pagination justify-content-center">
			<th:block th:with="start = ${pagination.startPage}, end = ${pagination.endPage}">
				<li class="page-item" th:classappend="${pagination.prev == false} ? 'disabled'">
					<a class="page-link" th:href="@{'/board/' + ${menu}(page=${start - 1}, range=${pagination.range - 1}, 
					searchText=${param.searchText})}">Previous</a>
				</li>

				<li class="page-item" th:classappend="${i == pagination.page} ? 'disabled'" th:if="${i != 0}"
					th:each="i : ${#numbers.sequence(start, end)}"><a class="page-link" href="#" th:href="@{'/board/' + ${menu}(page=${i}, 
					range=${pagination.range}, searchText=${param.searchText})}" th:text="${i}">1</a></li>

				<li class="page-item" th:classappend="${pagination.next == false} ? 'disabled'">
					<a class="page-link" th:href="@{'/board/'+ ${menu}(page=${end + 1}, range=${pagination.range + 1}, 
					searchText=${param.searchText})}" href="#">Next</a>
				</li>
			</th:block>
		</ul>
	</nav>
</body>

<pagingCommon.html>

  • th:fragment : 위 코드들에서 th:replace 붙은 곳에 보여짐
  • th:block - th:with : 새로운 변수 초기화 후 사용
  • https://black-mint.tistory.com/19의 4번에 정리
 

[Spring Boot] Thymeleaf 정리

스프링부트에서 타임리프로 프로젝트를 진행 중 2번 이상 다시 찾아본 개념에 대해 정리해놓으려 합니다. 기본 타임리프 문서 : https://www.thymeleaf.org/doc/tutorials/2.1/usingthymeleaf.html#standard-htmlx..

black-mint.tistory.com


728x90

1. MySQL 시간을 담을 컬럼은 DATETIME으로 설정

2. DTO에 Timestamp 타입으로 선언

private Timestamp createDate;

3. 생성 시점에 시간 셋팅해주기

member.setCreateDate(Timestamp.valueOf(LocalDateTime.now())); // 회원가입 시간
  • Member member
  • Timestamp.valueOf(LocalDateTime.now()) : 해당 로직 실행 당시 시간을 리턴


오류 발생 : 생성 시간보다 3시간 추가돼서 DB에 저장되는 것을 발견.


해결 : application.properties 파일에서 UTC부분을 Asia/Seoul로 수정

spring.datasource.url=jdbc:mysql://localhost:3306/board?serverTimezone=UTC&characterEncoding=UTF-8
spring.datasource.url=jdbc:mysql://localhost:3306/board?serverTimezone=Asia/Seoul&characterEncoding=UTF-8
728x90

문제 : 게시글 수정 작업 중 org.springframework.beans.NotReadablePropertyException 오류가 발생했다.


해결 : Thymeleaf에서 컨트롤러로 보내주는 파라미터 설정을 잘못하여 이를 고쳐줬다.

@Entity
@Data
@Table(name = "tb_board")
public class Board {

    @Id
    @GeneratedValue(strategy = GenerationType.IDENTITY)
    private Long id;

    @NotNull
    @Size(min = 2, max = 30, message = "제목은 2자 이상 30자 이하입니다.")
    private String title;

    @NotNull
    @Size(min = 1, message = "내용을 입력하세요.")
    private String content;

    @ManyToOne(targetEntity = Member.class, fetch = FetchType.LAZY)
    @JoinColumns({
            @JoinColumn(name = "writer", referencedColumnName = "username"),
            @JoinColumn(name = "writer_id", referencedColumnName = "id")
    })
    private Member member;
    private String image;
}
<form action="#" th:action="@{/board/form}" th:object="${board}" method="post">
	<input type="hidden" th:field="*{id}">
	<input type="hidden" th:field="*{member.id}">
	<input type="hidden" th:field="*{member.username}">
                .
                .
                .
	<div class="nav justify-content-end">
		<button type="submit" class="me-2 btn btn-primary">write</button>
	</div>
</form>
  • 타임리프에서 th:field="writer_id" 라고 작성해서 파라미터를 보내줬었는데, 참조하는 Entity의 필드명인 id를 적어주고 해결하였다.


'Web > Tymeleaf' 카테고리의 다른 글

[타임리프] Thymeleaf 정리  (0) 2021.12.18
728x90

스프링부트에서 타임리프(Thymeleaf)로 프로젝트를 진행 중 2번 이상 다시 찾아본 개념에 대해 정리해놓으려 합니다.

기본 타임리프 문서 : https://www.thymeleaf.org/doc/tutorials/2.1/usingthymeleaf.html#standard-htmlxml-comments


Tutorial: Using Thymeleaf

1 Introducing Thymeleaf 1.1 What is Thymeleaf? Thymeleaf is a Java library. It is an XML/XHTML/HTML5 template engine able to apply a set of transformations to template files in order to display data and/or text produced by your applications. It is better s

www.thymeleaf.org

수시로 업데이트!


1. 해당 조건이 만족할 때 컨텐츠 나타내기 (조건문 th:if)

<button class="btn btn-outline-secondary" th:if="${board.member.username == #httpServletRequest.remoteUser}" type="submit">삭제</button>
  • th:if문이 true로 나오면 컨텐츠 표시, 아니면 숨김
  • #httpServletRequest.remoteUser -> 현재 로그인한 유저 아이디
                <div id="uploadForm" th:if="${param.boardId == null}">
                    <div id="uploadElement">
                        <input id="uploadInput" type="file" class="btn btn-outline-primary" name="files" accept="image/*"
                            onchange="setThumbnail(event);" multiple /> <span style="font-size: small;"> * jpeg / png 타입의
                            이미지를
                            7개까지
                            등록해주세요.</span>
                    </div>
                    <a id="reset" class="mt-3 btn btn-danger" onclick="resetImg()">Reset</a>
                </div>
  • th:if문과 param(boardId가 url에 없을 때 div 태그가 보임)을 이용해서 컨텐츠를 보이고 안보이게 한다.
<div th:if="${menu} == 'home' or ${menu} == 'addAdmin'"></div>
  • 자바에서와 같이 || 나 && 사용 불가능
  • 대신 or 또는 and 키워드를 사용

2. 컨트롤러로 값 전달

<form th:if="${board.member.username == #httpServletRequest.remoteUser}" th:action="@{/board/delete}"
                    method="post">
    <input type="hidden" th:name="boardId" th:value="${board.id}">
    <button class="btn btn-outline-secondary" type="submit">delete</button>
</form>


    @PostMapping("/delete")
    public String boardDelete(Long boardId) {
        boardService.delete(boardId);

        return "redirect:/board/list";
    }
  • form 태그 안에 input 태그를 생성
  • input태그의 th:name으로 컨트롤러에 매핑할 변수값을 지정
  • 버튼 클릭 -> input태그의 th:value를 이용해서 값 제출

2-1. 체크박스 값 서버로 전달

            <form class="row g-3 justify-content-end" method="post" th:action="@{/board/myPost/delete}">
                <table class="table caption-top table-bordered table-hover">
                    <tbody>
                        <tr th:each="board : ${boardList}">
                            <td class="mt-5 text-center" scope="row">
                                <div class="checkbox">
                                    <input type="checkbox" name="boardIdList" th:value="${board.id}">
                                </div>
                            </td>
                            <td class="mt-5 text-center" scope="row" th:text="${board.id}">1</td>
                            <td><a th:text="${board.title}" th:href="@{/board/post(id=${board.id})}"
                                    style="text-decoration:none; color:black;">제목</a></td>
                            <td class="text-center" th:text="${#dates.format(board.createDate, 'yyyy/MM/dd HH:mm')}">작성일
                            </td>
                            <td class="text-center" th:text="${board.writer}">작성자</td>
                        </tr>
                    </tbody>
                </table>
		<button type="submit" class="btn btn-danger">Delete</button>
	</form>


    @PostMapping("/myPost/delete")
    public String boardDelete(@RequestParam(required = false) List<String> boardIdList) {
        if(boardIdList == null) return "redirect:/board/myPost";
        if(boardIdList.size() > 0) {
            for(int i = 0; i < boardIdList.size(); i ++) {
                boardService.temporaryDelete(Long.parseLong(boardIdList.get(i)));
            }
        }

        return "redirect:/board/myPost";
    }
  • form태그 안에 다음과 같이 체크 박스 name과 value를 지정. (th:each로 인해 게시글 개수만큼 체크박스 생성)
  • 체크박스에 체크하고 버튼으로 form을 제출하면 컨트롤러에 List 형태로 전달됨.

3. th:fragment 2개 이상 인자 전달

프로젝트 구조

<!-- Page -->
<nav th:replace="fragments/pagingCommon :: pagination(${pagination}, 'trash')"></nav>
  • 해당 코드는 board/trash 안에 작성된 페이징 관려 nav태그
  • th:replace="경로 :: 프래그먼트 명(${컨트롤러로부터 받은 객체 또는 모델명})
  • th:replace="경로 :: 프래그먼트 명('넘길 문자')"
  • trash는 4번에서 설명

컨트롤러에서 넘긴 객체

<body>
	<nav aria-label="Page navigation example" th:fragment="pagination(pagination, menu)">
		<ul class="pagination justify-content-center">
			<th:block th:with="start = ${pagination.startPage}, end = ${pagination.endPage}">
				<li class="page-item" th:classappend="${pagination.prev == false} ? 'disabled'">
					<a class="page-link" th:href="@{'/board/' + ${menu}(page=${start - 1}, range=${pagination.range - 1}, 
					searchText=${param.searchText})}">Previous</a>
				</li>

				<li class="page-item" th:classappend="${i == pagination.page} ? 'disabled'" th:if="${i != 0}"
					th:each="i : ${#numbers.sequence(start, end)}"><a class="page-link" href="#" th:href="@{'/board/' + ${menu}(page=${i}, 
					range=${pagination.range}, searchText=${param.searchText})}" th:text="${i}">1</a></li>

				<li class="page-item" th:classappend="${pagination.next == false} ? 'disabled'">
					<a class="page-link" th:href="@{'/board/'+ ${menu}(page=${end + 1}, range=${pagination.range + 1}, 
					searchText=${param.searchText})}" href="#">Next</a>
				</li>
			</th:block>
		</ul>
	</nav>
</body>

<페이징 관련 fragment 소스>

  • th:replace로 호출한 프레그먼트가 있는 html 파일에서 th:fragment="프리그먼트명(받은 값들)" 로 보내준다.

4. th:href 안에 변수 넣어 사용하기 (링크 컨트롤)

  • 페이징 소스를 사용하는 화면 곳곳마다 이동하는 링크는 다를테니 'list', 'myPost', 'trash' 같은 값을 replace할 때 인자로 보내서 th:href를 처리할 것이다.
  • 해당 처리를 하지 않은 코드는 th:href="@{/board/trash/(page=${start ...} ... )}" 
  • 처리 후 코드 : th:href="@{'/board/' + ${menu}(page=${start ...} ... )}"

5. 시큐리티 관련 메소드

사용을 위해 의존성 추가 (gradle)

implementation 'org.thymeleaf.extras:thymeleaf-extras-springsecurity5'


<a th:href="@{/loginForm}" class="btn btn-secondary fw-bolder me-4" sec:authorize="!isAuthenticated()">Login</a>
<form class="d-flex me-4" th:action="@{/logout}" sec:authorize="isAuthenticated()">
	<span class="text-white me-4 mt-2 fw-bolder" sec:authentication="name">사용자</span>
    <a th:href="@{/admin}" class="btn btn-danger" style="font-weight: bold" sec:authorize="hasRole('ROLE_ADMIN')">관리자 화면</a>
	<button th:href="@{/logout}" class="btn btn-secondary fw-bolder">Logout</button>
</form>
  • sec:authorize="isAuthenticated()  -> 로그인한 사용자에게 보여줌
  • sec:authentication="name"  -> 로그인한 사용자 이름을 표시
  • sec:authorize="hasRole('ROLE_ADMIN')" -> 권한이 ROLE_ADMIN인 사용자에게만 보여줌

참고, Authentication : 로그인, Authroization : 권한

6. Validator 관련 내용 (에러 내용 표시) + th:object, th:field, th:errors

<form th:action="@{/join}" method="post" th:object="${member}">          
          <div class="form-floating mt-4">
            <input type="text" class="form-control" th:field="*{username}" th:classappend="${#fields.hasErrors('username')} ? 'is-invalid'" id="floatingInput" placeholder="Username">
            <label for="floatingInput">Username</label>
            <div th:if="${#fields.hasErrors('username')}" th:errors="*{username}" id="validationServer03Feedback" class="invalid-feedback text-start">
              Username Error
            </div>
          </div>
          <div class="form-floating">
            <input type="password" class="form-control mt-2" th:field="*{password}" th:classappend="${#fields.hasErrors('password')} ? 'is-invalid'" id="floatingPassword" placeholder="Password">
            <label for="floatingPassword">Password</label>
            <div th:if="${#fields.hasErrors('password')}" th:errors="*{password}" id="validationServer03Feedback" class="invalid-feedback text-start" style="margin-bottom: 8px;">
              Password Error
            </div>
          </div>
          <div class="form-floating">
            <input type="email" class="form-control" th:field="*{email}" th:classappend="${#fields.hasErrors('email')} ? 'is-invalid'" id="floatingPassword" placeholder="Email">
            <label for="floatingPassword">example@board.com</label>
            <div th:if="${#fields.hasErrors('email')}" th:errors="*{email}" id="validationServer03Feedback" class="invalid-feedback text-start" style="margin-top: 8px;">
              Email Error
            </div>
          </div>
      
          <div class="checkbox mb-3">
          </div>
          <button class="w-100 btn btn-lg btn-primary mt-2" type="submit">Get started!</button>
          <a type="button" class="w-100 btn btn-lg btn-primary mt-2" th:href="@{/}">exit</a>
        </form>
  • form 태그 안에서 사용된 타임리프의 th:if가 달린 3개의 div 태그에서 에러를 출력해준다.
  • th:if=${#fields.hasErrors('필드명')} : 에러가 발생한 경우 true 값을 반환하여 div태그를 표시해준다.
  • form 태그의 th:object="{member}" : GetMapping 때 전달받은 Member의 키 값을 넣어 전달 받은 객체
  • th:field="*{username}" :  위 설명을 참고해서 Member.getUsername()을 View에서 사용할 수 있도록 한 값이다. -> ${member.username} 과 같다고 생각!
  • th:errors="*{password}" : password에 대한 에러 내용을 표시해준다.

7. th:block - th:with 로 변수 정의, th:each - #numbers.sequence(from, to), 링크 url

<body>
	<nav aria-label="Page navigation example" th:fragment="pagination(pagination)">
		<ul class="pagination justify-content-center">
			<th:block th:with="start = ${pagination.startPage}, end = ${pagination.endPage}">
				<li class="page-item" th:classappend="${pagination.prev == false} ? 'disabled'">
					<a class="page-link" th:href="@{/board/list(page=${start - 1}, range=${pagination.range - 1}, 
					searchText=${param.searchText})}">Previous</a>
				</li>

				<li class="page-item" th:classappend="${i == pagination.page} ? 'disabled'"
					th:each="i : ${#numbers.sequence(start, end)}"><a class="page-link" href="#" th:href="@{/board/list(page=${i}, 
					range=${pagination.range}, searchText=${param.searchText})}" th:text="${i}">1</a></li>

				<li class="page-item" th:classappend="${pagination.next == false} ? 'disabled'">
					<a class="page-link" th:href="@{/board/list(page=${end + 1}, range=${pagination.range + 1}, 
					searchText=${param.searchText})}" href="#">Next</a>
				</li>
			</th:block>
		</ul>
	</nav>
</body>
  • th:block 태그에 th:with로 사용할 변수에 값을 초기화해서 사용가능.
  • th:each에 #numbers.sequence(from, to)를 사용해서 from에서부터 to까지 i변수에 넣어 사용
  • th:href="@{/board/list(page=${end + 1}, range=${pagination.range + 1}" : board/list?page=...&range=...  

7.2 th:block th:with 조건문 사용

                        <tbody>
                            <th:block th:with="no = ${param.page != null} ? (${#numbers.formatInteger(param.page, 1)} - 1) * 10 : 0">
                                <tr th:each="member : ${memberList}">
                                    <td class="mt-5 text-center" scope="row">
                                        <div class="checkbox">
                                            <input type="checkbox" name="memberIdList" th:value="${member.id}">
                                        </div>
                                    </td>
                                                           .
                                                           .
                                                           .
                                </tr>
                            </th:block>
                        </tbody>
                    </table>
  • 삼항 연산자를 통해 특정 변수를 선언하고 값을 초기화한다.
  • #numbers.formatInteger(int형으로 변환할 변수, 자릿수) : no변수는 url에 page 파라미터가 없을 경우는 기본값 0
  • 이를 활용하면 파라미터의 값이 있을 때와 없을 때 변수값을 다르게 설정할 수 있다. 즉, 파라미터 값 유무에 따라 다르게 처리 할 수 있다.

8. 타임리프에서 날짜 형식 바꾸기

<td class="text-center" th:text="${#dates.format(board.createDate, 'yyyy/MM/dd HH:mm')}">작성일</td>

9. th:each 활용

index  현재 반복 인덱스 (0부터 시작)
count 현재 반복 인덱스 (1부터 시작)
size 총 개수
current 현재 요소
even 현재 요소가 짝수인지 여부 (index 기준)
odd 현재 요소가 홀수인지 여부 (index 기준)
first 현재 요소가 첫번째인지 여부
last 현재 요소가 마지막인지 여부
  • 사용방법
                            <tr th:each="member : ${memberList}">
                                <td class="text-center" th:text="${memberStat.count}">count</td>
                                <td class="text-center" th:text="${memberStat.index}">index</td>
                            </tr>

10. 타임리프 문자열 비교

<p th:text="${#strings.equals(member.role, 'ROLE_ADMIN') ? 'ADMIN' : 'USER'}">권한</p>
  • #strings.equals를 이용해 첫 인자와 두번째 인자가 같은지 체크할 수 있다.


728x90

로그인 후 그 객체의 사용법을 정리해보자.

1. Bean을 통해 가져오기

SecurityContextHolder를 통해 가져온다.

Object principal = SecurityContextHolder.getContext().getAuthentication().getPrincipal(); 
UserDetails userDetails = (UserDetails)principal; 
String username = principal.getUsername(); 
String password = principal.getPassword();


2. Controller에서 사용자 정보 얻기

Principal 객체에 접근해서 정보를 가져온다.

    @GetMapping("/list")
    public String test(Model model, Principal principal){
        String loginUsername = principal.getName();        
        model.addAttribute("loginUsername", loginUsername);
        
        return "board/list";
    }


-


출처 : https://djunnni.gitbook.io/springboot/2019-11-30


추가 : 로그인 초기화 (회원탈퇴 등에 사용)

SecurityContextHolder.clearContext();

+ Recent posts