728x90

게시글 작성 및 수정 작업 중 @Valid 를 사용하지 않고 자바스크립트를 통해 form 데이터를 검증하도록 하였다.

관련 프로젝트 : https://black-mint.tistory.com/70


[Spring Boot] 게시글 작성, 수정

이전 파일 업로드 글과 연관지어 게시글 작성의 구현을 마무리하고 이를 정리하겠습니다. 파일첨부에 대해서는 언급하지 않겠습니다! 이전 글 : https://black-mint.tistory.com/62?category=982467 [Spring Boot].

black-mint.tistory.com


1. html 코드

			<form action="#" th:action="@{/board/form}" th:object="${board}" method="post" enctype="multipart/form-data"
				onsubmit="return checkForm(this);">
				<div class="mb-3">
					<label for="title" class="form-label">제목</label>
					<input type="text" class="form-control" id="title" th:field="*{title}">
				</div>
				<div class="mb-3">
					<label for="content" class="form-label">내용</label>
					<textarea class="form-control" id="content" rows="13" th:field="*{content}"></textarea>
				</div>

				<div class="nav justify-content-end mb-5">
					<button id="submit" type="submit" class="me-2 btn btn-primary">작성</button>
				</div>
			</form>
  • onsubmit을 이용해 form 양식 제출 시 값을 검증한다.
  • checkForm(this) : this를 넣어줌으로써 자바스크립트에서 form 태그에 담긴 데이터를 컨트롤하는데 용이

2. 검증 script 코드

		// form submit 검증
		function checkForm(form) {
			if (form.title.value == "") {
				alert('제목을 입력하세요.');
				form.title.classList.add('is-invalid');
				form.title.focus();
				return false;
			}

			if (form.content.value == "") {
				alert('내용을 입력하세요.');
				form.title.classList.remove('is-invalid');
				form.content.classList.add('is-invalid');
				form.content.focus();
				return false;
			}
			form.content.classList.remove('is-invalid');
			return true;
		}
  • 파라미터로 넘어온 form(this)를 이용해 값을 확인한다.
  • form.[name].value : 제출된 [name] 이름을 가진 element의 값
  • classList.add : 해당 태그에 클래스를 추가한다.
  • classList.remove : 해당 태그의 클래스를 제거한다.
  • focus() : 해당 태그로 커서를 옮긴다.
  • return false의 경우 서버로 값이 넘어가지 않음.
728x90

이전 파일 업로드 글과 연관지어 게시글 작성의 구현을 마무리하고 이를 정리하겠습니다.

파일첨부에 대해서는 언급하지 않겠습니다!

이전 글 : https://black-mint.tistory.com/62?category=982467 


[Spring Boot] 파일 첨부 (게시글 이미지 첨부)

게시글 작성에서 파일 첨부하는 방법을 기록한다. (본 글은 이미지 첨부 방법을 다룸) 1. Mysql - file 테이블 CREATE TABLE `tb_file` ( `id` int NOT NULL AUTO_INCREMENT, `board_id` int NOT NULL, `original_..

black-mint.tistory.com


1. Mysql - 테이블

CREATE TABLE `tb_board` (
  `id` int NOT NULL AUTO_INCREMENT,
  `title` varchar(255) NOT NULL,
  `content` text NOT NULL,
  `writer_id` int NOT NULL,
  `writer` varchar(20) NOT NULL,
  `delete_yn` varchar(1) DEFAULT 'N',
  `create_date` datetime DEFAULT NULL,
  `views` int DEFAULT '0',
  `type` varchar(20) DEFAULT 'board',
  PRIMARY KEY (`id`),
  KEY `writer_id` (`writer_id`),
  CONSTRAINT `tb_board_ibfk_1` FOREIGN KEY (`writer_id`) REFERENCES `tb_userinfo` (`id`) ON DELETE CASCADE
)


2. BoardDTO

@Data
public class Board {
    private Long id;
    private String title;
    private String content;
    private Long writerId;
    private String writer;
    private String deleteYN;
    private Timestamp createDate;
    private Long views;
    private String type;
}


3. 게시글 작성 Controller

// 게시글 신규 작성 폼 진입 & 기존 게시글 불러오기
@GetMapping("/form")
public String form(Model model, @RequestParam(required = false) Long boardId) {
    if (boardId == null) {
        model.addAttribute("board", new Board());
    } else {
        Board board = boardService.contentLoad(boardId, "board");
        model.addAttribute("board", board);
    }

    return "board/form";
}
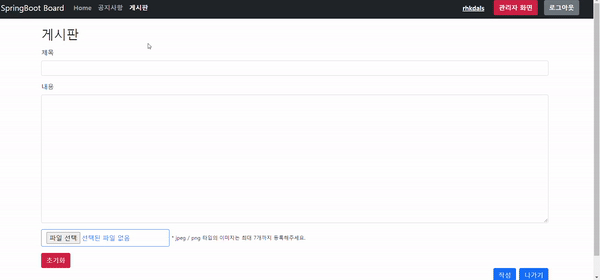
  • 게시글 작성, 수정 화면으로 이동하는 GetMapping
  • 기존 게시글을 수정하는 경우 기존 게시글 내용을 추가해주기 위해 Service를 통해 정보를 얻어와 addAttribute를 진행


// 게시글 작성 & 수정
@PostMapping("/form")
public String boardSubmit(Board board, Principal principal,
                          @RequestParam(value = "files", required = false) List<MultipartFile> files,
                          @RequestParam(value = "boardId", required = false) Long boardId) throws IOException, SQLException {
    if (board.getTitle().length() < 1 || board.getContent().length() < 1 || (!CollectionUtils.isEmpty(files) && files.size() > 7)) {
        // 잘못된 입력값이 들어왔을 때 다시 해당 페이지로 로딩
        if(boardId != null) {
            return "redirect:/board/form?boardId=" + boardId;
        }
        return "redirect:/board/form";
    }

    String loginUsername = principal.getName();
    String type = "board";

    if (boardId == null) { // 새 글 작성
        Long newBoardId = boardService.save(board, loginUsername, type); // Insert

        // 첨부파일 있을 때
        if (!files.get(0).getOriginalFilename().isEmpty()) {
            for (int i = 0; i < files.size(); i++) {
                if (files.get(i).getContentType().contains("image/")) {
                    fileService.saveFile(files.get(i), newBoardId);
                } else {
                    System.out.println("이미지 타입이 아닙니다");
                }
            }
        }
    } else { // 기존 글 수정
        boardService.update(board, boardId, type); // Update
    }

    return "redirect:/board/list";
}
  • 이 전글에선 @Valid를 사용했지만 이번 글에서는 Javascript를 이용해 View에서 제목과 내용의 유무를 체크할 예정입니다. 물론 첫 줄의 검증 코드로 어느정도 검증을 진행! (Valid를 통해서 값을 검증하니 여러 오류가 발생했어요.. 이에 대한 대체 방안입니다,,,)
  • 작성(create), 수정(update)를 하나의 Controller와 View에서 처리하기 때문에 boardId(게시판 id)가 null인 상태와 null이 아닌 상태를 나눠서 처리했습니다.
  • type : 향후 다른 종류 게시판을 만들거나 공지사항 추가 등 서비스의 확장을 고려해 추가했습니다.


4. Service

// id를 이용해서 해당 글 수정
public Board contentLoad(Long id, String type) {
    Board board = new Board();
    board.setId(id);
    board.setType(type);
    try {
        board = boardRepository.findById(board);
    } catch (Exception e) {
        System.out.println("boardService.contentLoad() .. error : " + e.getMessage());
    } finally {
        return board;
    }
}
  • GetMapping에서 사용되는 contentLoad입니다.
// 글 등록
public Long save(Board board, String loginUsername, String type) {
    board.setCreateDate(Timestamp.valueOf(LocalDateTime.now()));

    try {
        Member member = memberService.getMember(loginUsername);

        board.setWriterId(member.getId());
        board.setWriter(member.getUsername());
        board.setType(type);

        boardRepository.insertBoard(board);
    } catch (Exception e) {
        System.out.println("boardService.save() .. error : " + e.getMessage());
    }
    return board.getId();
}
// 글 수정
public Long update(Board board, Long boardId, String type) {
    board.setId(boardId);
    board.setType(type);

    try {
        boardRepository.updateBoard(board);
    } catch (Exception e) {
        System.out.println("boardService.update() .. error : " + e.getMessage());
    }
    return board.getId();
}


5. Mapper.xml

<!--특정 아이디 게시글 조회-->
<select id="findById" resultType="Board">
    SELECT
        <include refid="boardColumns"/>
    FROM
        tb_board
    WHERE
        id = #{id} AND type = #{type}
</select>
  • type : board, notice 등으로 조회합니다. (해당 포스트 같은 경우 board입니다.)
  • 만약 공지사항을 조회한다면 notice가 들어갈 것입니다.


<!--게시글 작성-->
<insert id="insertBoard" parameterType="Board" useGeneratedKeys="true" keyProperty="id">
    INSERT INTO
         tb_board (title, content, writer_id, writer, create_date, type)
    VALUES
        (#{title}, #{content}, #{writerId}, #{writer}, #{createDate}, #{type})
</insert>

<!--게시글 업데이트-->
<update id="updateBoard" parameterType="Board" useGeneratedKeys="true" keyProperty="id">
    UPDATE
        tb_board
    SET
        title = #{title}
        ,content = #{content}
    WHERE
        id = #{id} AND type = #{type}
</update>
  • useGenratedKeys, keyProperty : insert와 update 시 결과값으로 완료된 row의 pk(id)를 반환받습니다.


6. View

			<form action="#" th:action="@{/board/form}" th:object="${board}" method="post" enctype="multipart/form-data"
				onsubmit="return checkForm(this);">
				<input type="hidden" name="boardId" th:value="*{id}">
				<input type="hidden" th:field="*{writerId}">
				<div class="mb-3">
					<label for="title" class="form-label">제목</label>
					<input type="text" class="form-control" id="title" th:field="*{title}">
				</div>
				<div class="mb-3">
					<label for="content" class="form-label">내용</label>
					<textarea class="form-control" id="content" rows="13" th:field="*{content}"></textarea>
				</div>

				<div id="imageThumbnail">
				</div>

				<!-- button -->
				<th:block th:if="${param.boardId} == null">
					<div id="uploadForm">
						<div id="uploadElement">
							<input id="uploadInput" type="file" class="btn btn-outline-primary" name="files"
								accept="image/*" onchange="setThumbnail(event);" multiple /> <span
								style="font-size: small;"> * jpeg / png 타입의
								이미지는
								최대 7개까지
								등록해주세요.</span>
						</div>
						<a id="reset" class="mt-3 btn btn-danger" onclick="resetImg()">초기화</a>
					</div>
				</th:block>


				<div class="nav justify-content-end mb-5">
					<button id="submit" type="submit" class="me-2 btn btn-primary">작성</button>
					<a type="button" class="btn btn-primary" th:href="@{/board/list}">나가기</a>
				</div>
			</form>
  • th:object - form을 제출할 때 설정된 객체로 리턴됩니다. (이 경우 컨트롤러의 Board)
  • th:field - 해당 값(name과 value)을 th:object에서 설정된 객체의 내부 값으로 설정됩니다. (Board.setId, Board.setTitle...등)
  • onsubmit : form 태그의 값을 서버로 전송하기 전에 실행하여 유효성을 체크합니다. 


7. form검증을 위한 script (파일 처리부분은 이 전글 참고)

		// form submit 검증
		function checkForm(form) {
			if (form.title.value == "") {
				alert('제목을 입력하세요.');
				form.title.classList.add('is-invalid');
				form.title.focus();
				return false;
			}

			if (form.content.value == "") {
				alert('내용을 입력하세요.');
				form.title.classList.remove('is-invalid');
				form.content.classList.add('is-invalid');
				form.content.focus();
				return false;
			}
			form.content.classList.remove('is-invalid');
			return true;
		}
  • onsubmit에서 this를 통해 받았기 때문에 form.[name]으로 element를 지정가능!
  • 제목이나 내용이 없을 경우 경고 팝업을 띄워주고, 해당 input 또는 textarea의 class에 is-invalid를 추가해줍니다. (bootstrap을 이용해 빨간 input칸으로 변화)
  • false를 return 받는 경우는 서버로 form 값이 제출 안됩니다.


8. 시연


728x90

특정 버튼을 클릭했을 때 다른 태그의 내용을 보여주고자 한다. 자바스크립트로 태그 내용을 숨겨보자.

또, 숨겼던 태그를 나타내보자.

1. 태그 숨기기

document.getElementById('userList').style.display = "none"
  • document.getElementById로 숨기고자 하는 태그를 가져온다.
  • style.display = "none"으로 숨긴다.

2. 태그 나타내기

document.getElementById('userList').style.display = "block"
  • 위 내용과 동일하게 작성하고 none을 block으로 바꾸면 된다. 

3. 활용

계정생성 버튼을 선택하면 <div id="addDiv">가 나타나고 돌아가기를 클릭하면 <div id="userList>태그가 나타난다.

<div id="userList>
	<a type="button" class="btn btn-primary me-2" onclick="changeDiv()">계정생성</a>
</div>
<div id="addDiv">
	<a type="button" class="btn btn-primary me-2" onclick="changeDiv()">돌아가기</a>
</div>


        // 회원 리스트 폼 & 회원 생성 폼 전환
        function changeDiv() {
            var listDiv = document.getElementById('userList');
            var addDiv = document.getElementById('addUser');

            if(listDiv.style.display === 'none') {
                listDiv.style.display = 'block';
                addDiv.style.display = 'none';
            } else {
                listDiv.style.display = 'none';
                addDiv.style.display = 'block';
            }
        }
  • a태그의 타입을 button으로 지정하고 onclick으로 자바스크립트 함수를 호출해준다.
  • 버튼을 누르면 display 상태에 따라 특정 태그를 숨기고 나타낸다.
728x90

체크박스에 체크하고 삭제하는 글관리 구현 중 전체 체크박스를 체크하는 기능을 구현한다.


1. html 코드

                <table class="table caption-top table-bordered table-hover">
                    <caption>List</caption>
                    <thead>
                        <tr>
                            <th class="text-center" width="50" scope="col">
                                <input type="checkbox" onclick="selectAll(this)">
                            </th>
                            <th class="text-center" width="50" scope="col">No</th>
                            <th class="text-center" width="950" scope="col">제목</th>
                            <th class="text-center" width="200" scope="col">작성일</th>
                            <th class="text-center" width="180" scope="col">작성자</th>
                        </tr>
                    </thead>

                    <tbody>
                        <tr th:each="board : ${boardList}">
                            <td class="mt-5 text-center" scope="row">
                                <div class="checkbox">
                                    <input type="checkbox" name="boardIdList" th:value="${board.id}">
                                </div>
                            </td>
                            <td class="mt-5 text-center" scope="row" th:text="${board.id}">1</td>
                            <td><a th:text="${board.title}" th:href="@{/board/post(boardId=${board.id})}"
                                    style="text-decoration:none; color:black;">제목</a></td>
                            <td class="text-center" th:text="${#dates.format(board.createDate, 'yyyy/MM/dd HH:mm')}">작성일
                            </td>
                            <td class="text-center" th:text="${board.writer}">작성자</td>
                        </tr>
                    </tbody>
                </table>
  • 체크박스에 onclick 이벤트를 달아준다.

2. 스크립트 코드

    <script>
        function selectAll(selectAll) {
            var checkboxs = document.querySelectorAll(['input[type="checkbox"]'])

            checkboxs.forEach((checkbox) => {
                checkbox.checked = selectAll.checked
            })
        }
    </script>
  • document.querySelectorAll : 모든 체크박스 쿼리를 가져옴
  • this로 체크박스를 받았기 때문에 this체크박스가 체크되면 모든 체크박스가 체크되도록 코드 작성

* 출처 : https://hianna.tistory.com/432

728x90

서버에서 Json 형태로 프론트로 넘어오면 날짜 형식이 다음과 같이 변경돼서 날아온다.

"createDate""Jan 5, 2022, 4:25:48 PM"

원하는 날짜 형식으로 바꿔 보여주고 싶을 때 사용할 라이브러리

https://momentjs.com/


Moment.js | Home

Format Dates moment().format('MMMM Do YYYY, h:mm:ss a'); moment().format('dddd'); moment().format("MMM Do YY"); moment().format('YYYY [escaped] YYYY'); moment().format(); Relative Time moment("20111031", "YYYYMMDD").fromNow(); moment("20120620", "YYYYMMDD"

momentjs.com

사용법

<script type="text/javascript" src="https://cdnjs.cloudflare.com/ajax/libs/moment.js/2.24.0/moment.min.js"></script>
  • 스크립트를 추가하고 사용하면된다.
moment(변수).format("YYYY-MM-DD HH:mm:ss")
  • 사용 문법

* 적용 프로젝트

https://black-mint.tistory.com/50


[Spring Boot] 댓글 기능 - REST API 규칙 적용

저번에 작성한 댓글 기능 구현 코드를 REST API 규칙에 맞게 수정하도록한다. * 이전 댓글 구현 글 https://black-mint.tistory.com/35 [Spring Boot] Ajax(비동기) 통신으로 댓글 구현 (+ Jquery 사용법) 게시판..

black-mint.tistory.com


728x90

1. 자바스크립트 빈 문자열 검사 함수

function isEmpty(strIn)
{
    if (strIn === undefined)
    {
        return true;
    }
    else if(strIn == null)
    {
        return true;
    }
    else if(strIn == "")
    {
        return true;
    }
    else
    {
        return false;
    }
}

* 출처 : https://stackoverflow.com/questions/19592721/isempty-is-not-defined-error


isEmpty is not defined-error

I was getting an error as isEmpty is not defined .what i have to do .while alerting too it is not showing any alert. <!DOCTYPE html> <html> <head> ...

stackoverflow.com

2. 활용

        function insertComment() {
            var boardId = $('input[name=boardId]').val()
            var content = document.getElementById("content").value;

            if (isEmpty(content) == true) {
                alert('댓글을 입력해주세요.')
                return false;
            } else {
                $.ajax({
                    type: 'POST',
                    url: '/board/comment/write',
                    data: {
                        boardId: boardId,
                        content: content
                    },
                    success: function (response) {
                        getComments()
                        console.log("insert success")
                    },
                    error: function (response) {
                        console.log("insertComment error : " + response)
                    },
                })
            }
        }
  • 댓글 추가 ajax 코드
  • 댓글 내용 없이 작성버튼을 클릭하면 경고문을 띄우고 리턴.
728x90

1. 확인창

if (confirm("정말 삭제하시겠습니까?")) {
	// 확인 클릭시
} else { // 취소 클릭 시
	return;
}

2. 팝업창 띄우기

alert('hello')


728x90

1, 다른 태그 값 가져오기

var content = document.getElementById(id).innerText;

2. 사용자가 input 또는 textarea에 작성한 값 가져오기 (버튼 클릭시 실행)

var content = document.getElementById("newComment").value;


관련 프로젝트

https://black-mint.tistory.com/35


[Spring Boot] Ajax(비동기) 통신으로 댓글 구현 (+ Jquery 사용법)

게시판 댓글을 구현하는 도중 비동기 호출에 대해 알게 됐고, 이를 이용하려면 Ajax를 활용해야 한다는 정보를 얻었다. 비동기란? 비동기의 반대인 동기적 통신의 경우 절차적으로 일을 차례로

black-mint.tistory.com


728x90

회원탈퇴를 진행하는 도중 체크박스로 동의 여부를 받기 위해 체크박스 사용법을 기록

<head>
    ...
   <script type="text/javascript">
        // 체크박스 체크여부 확인
        function CheckForm(secession) {
            var chk=document.secessionForm.check.checked;
    
            if(!chk){
                alert("체크박스를 체크해주세요.");
                return false;
            }
        }
    </script>
</head>

<body>
	<form th:action="@{/account/secession}" method="post" name="secessionForm" onsubmit="return CheckForm(this)">
    	...
        	<div class="checkbox mt-3 mb-3">
			<label>
				<input type="checkbox" name="check" value="agreement"> 정말 탈퇴하시겠습니까?
			</label>
    		</div>
	</form>
</body>
  • form 태그에 name과 onsubmit(js 함수)을 설정
  • form > input 태그의 name 설정
  • script태그로 body 부분에서 정의한 name들로 함수를 정의해서 사용.
  • document.[form태그 이름].[input 체크박스 이름].checked
  • alert : 팝업창

+ Recent posts